Deployment environments are necessary for any software project. Serverless computing eliminates the need to manage or provision hardware, but it’s not immediately obvious how we can safely separate development, testing, and production environments with AWS. AWS Organizations provides a simple, secure, and effective way of managing your deployment environments.
Deployment Environments with AWS Organizations
When you create your first AWS account, the Control Panel makes it easy to get started with your first Lambda and some DynamoDB tables to support it. But, what happens when you’re ready to release something to production for general use? We need environment that looks something like this:

The creation of multiple environments is a necessity in any product that you plan to release. I will get you up and running quickly here, but if you want an in-depth answer to this problem, you can read this AWS whitepaper. In summary:
Using multiple AWS accounts to help isolate and manage your business applications and data can help you optimize across most of the AWS Well-Architected Framework pillars, including operational excellence, security, reliability, and cost optimization.
AWS Docs
You can setup entirely different AWS accounts, or you can use Organizations to create these accounts. As a developer, I like hierarchies and structure. It just makes things so much easier to understand and can help simplify something that’s complicated. The AWS explanation of Organizations is:
AWS Organizations lets you create new AWS accounts at no additional charge. More easily allocate resources, group accounts, and apply governance policies to accounts or groups.
AWS Docs
With Organizations you can visualize each account you create as analogous to an environment:

In fact, when you login as a newly created account, you’ll notice that any Lambdas, DynamoDB tables, Cognito User Pools, really anything you’ve created in another account won’t be there. This account is effectively a fresh environment, ready to be setup.
Some quick advantages to this approach over creating completely separate accounts:
- Your accounts (i.e. environments) can all be seen in a hierarchical view in one place. This makes it easy to know what environments exist and how they are accessed.
- All billing rolls up to the Organization level allowing you easier management of AWS costs.
- Later you can define shared security policies and other configurations that apply to all environments at the organizational level.
Now that we understand what needs to be done, let’s see how we can do it.
Setting up an Organization
The first step is to create your Organization. Simply search for AWS Organizations at the top of the console and navigate there. If you haven’t created an Organization yet, you will see the following screen. Simply click, “Create an Organization” to get started.

This will initially create a Root Organization with your current AWS account as the root management account. To create an Organization for your environment accounts, do the following:
- Select the checkbox for the Root Organization
- Expand Actions and select “Create New” under Organizational Unit
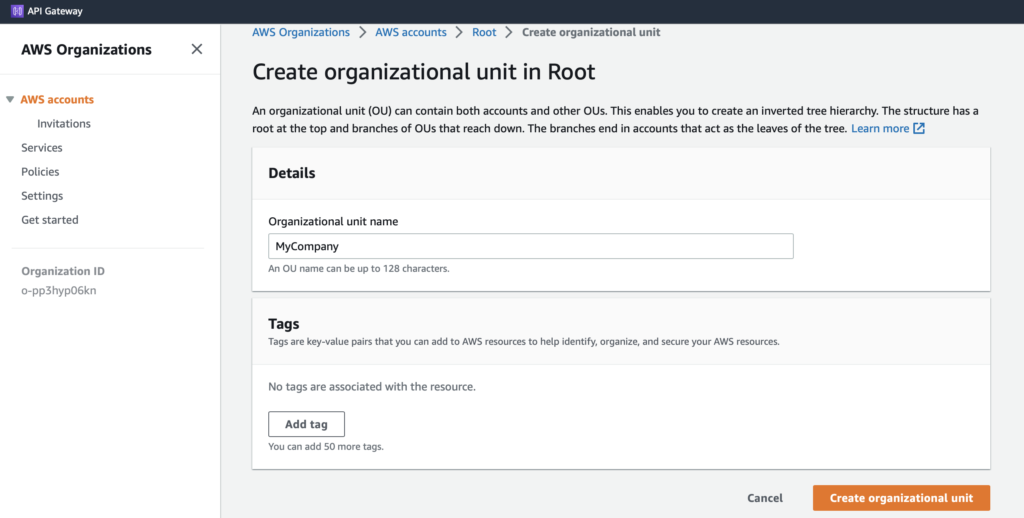
- Now enter the information for your Organizational Unit
Setting up your Accounts
Now back on the AWS Accounts screen, you can start creating the Accounts for each environment. Select the “Add an AWS Account” button and fill in the information under the “Create an AWS Account” tab:
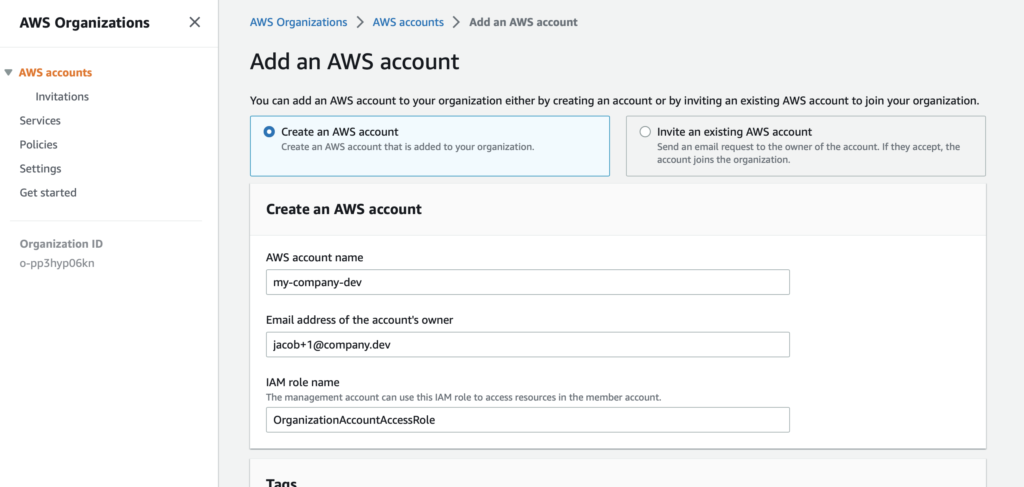
A couple of pro tips here:
- Name your accounts according to the environment it represents (e.g. my-company-dev, my-company-test, my-company-prod). A naming convention makes it clear what company and environment each account represents.
- Each account requires a unique email address. I like to use my email address appended with a number (e.g. jacob+1@company.dev, jacob+2@company.dev, etc). This will go to your standard email and you can setup a rule for these emails to go to a specific folder for organizational purposes.
Now you can organize these accounts into the Organizational Unit you created. On the AWS Accounts screen:
- Select the checkbox next to the accounts you just created
- Expand Actions and select “Move”
- Check the Organizational Unit you just created and select “Move AWS accounts”
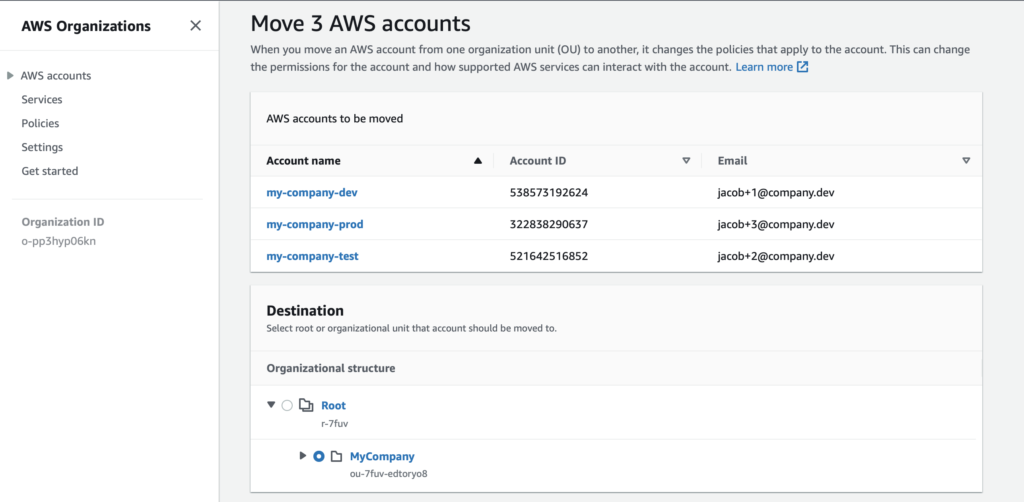
Now your Organizational Unit will look something like the following with all of your accounts organized underneath.

Login to your Accounts
This one baffled me the first time I went through this process. I didn’t receive an email or any login information for the accounts I just created. The solution is simple:
- Logout of the Control Panel
- Start the login flow with the email address of one of your newly created accounts
- Use the “Forgot Password” link to receive a link to change your password
- After changing your password, you can now login
Next Steps
Now that we have our Organizational Unit and Accounts setup, we can deploy our code. Doing this through the Control Panel is not only tedious, but error prone. It’s possible to automate the creation of your Serverless components, Lambdas, DynamoDB tables, Cognito User Pools, etc. In my next Serverless Patterns installment, we’ll walk through using CloudFormation to automate your environment setup.
Learn more:
- If you want to manage all your AWS accounts in one place, you can apply policies for every account and Organizational Unit with Control Tower.
- If you want to learn why automating your environment setup is important, read Why I Spend More on Coffee Than DevOps.
- If you want to learn how Serverless Computing can help your organization with its digital transformation, read 4 Ways Serverless Accelerates your Digital Transformation.
Follow me to get notified when my next installment is released.